How to create a Lesson using the Image Hotspots Component?
You can create an image with interactive hotspots using this component. The Image Hotspots content type allows you to place an overlay of hotspots on images and graphics. The user clicks the hotspots to reveal an associated text.
When to use this Component
Image hotspots can be useful for creating infographics fast and simple. You can use any image and enrich it with points of interest and in-depth information about the details depicted. The user is activated by interacting with the image.
How it works
-
User can see an image with many hotspots placed on some specific areas of the image.
-
When the user hovers the mouse on a hotspot, its size is increased indicating that you can click on it.
-
The user clicks on a hotspot, and a window containing a header and description text is displayed on the left or right side of the image.
-
The user can click on all the hotspots in the same way to find the corresponding header and description text.
Features of this Component
- You can change the color of the hotspots using a hexadecimal color code.
- You can add any number of hotspots for a page.
- You can position the hotspots by mentioning its location in percentages.
You can create a page using this component by following the below steps.
Step 1: Go to the required Slide
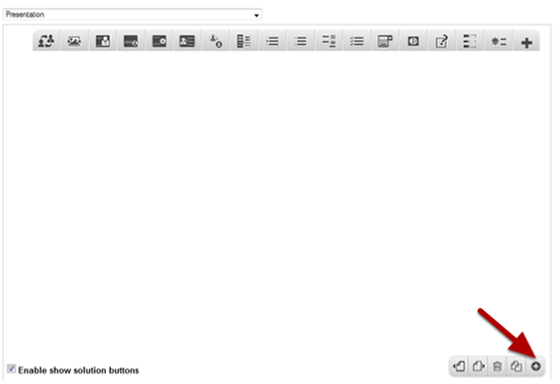
If you are creating a new Presentation, you will be taken to the first slide where you can use this component and create a page. Alternatively, if you want to add a new slide where you want to use this component, click on the '+' icon on the lower right corner as shown in the above image.
Step 2: Click on the Image Hotspots Component Icon
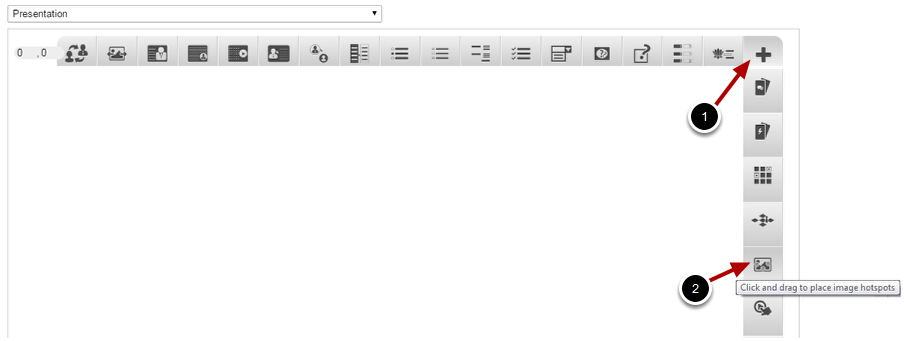
Click on the More elements [1] icon then click on the Image Hotspots [2] Component icon as shown in the above image. You will see a screen similar to the image shown below.
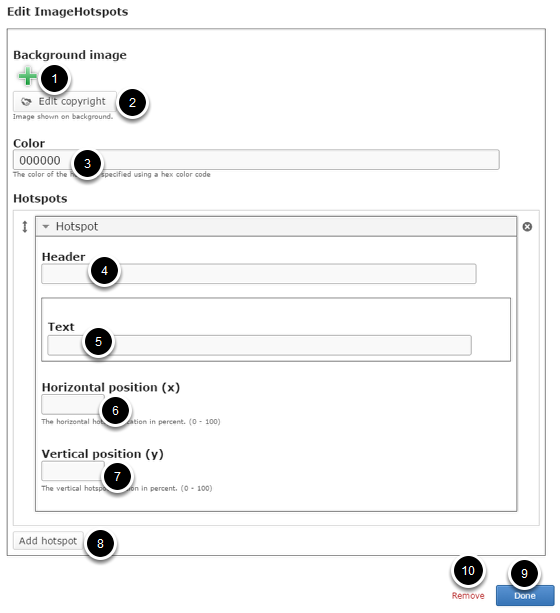
On this screen, you can
- Add an image to be shown on background using the + button under the Background Image [1] title and edit its copyright by clicking the Edit copyright [2] button.
- Set the color of the hotspots by typing a hexadecimal color code in the Color [3] field.
- Add a header for the hotspot in the Header [4] field under the Hotspot title.
- Add a description to the hotspot in Text [5] field.
- Set the hotspot location in percent by typing in the Horizontal position (x) [6] and Vertical position (y) [7] fields.
- Add more hotspots by clicking on the Add hotspot [8] button.
- Click on the Done [9] button to save the changes.
- Remove the component by clicking the Remove [10] button
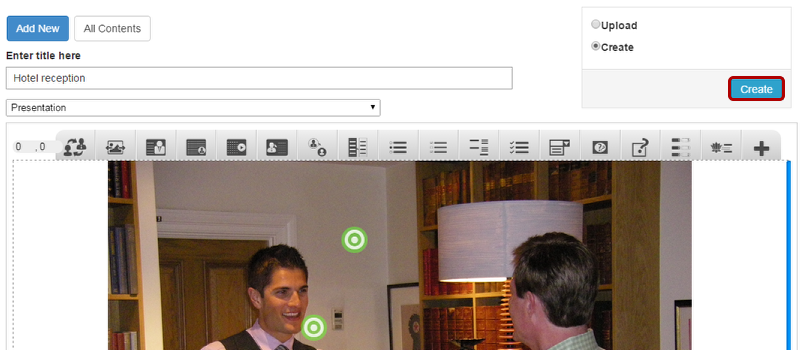
Step 3: Add Background Image
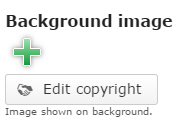
You can add an optional background image for the page by clicking the '+' icon under the Background image title as shown in the above image. You will choose an image file as shown in the below image.
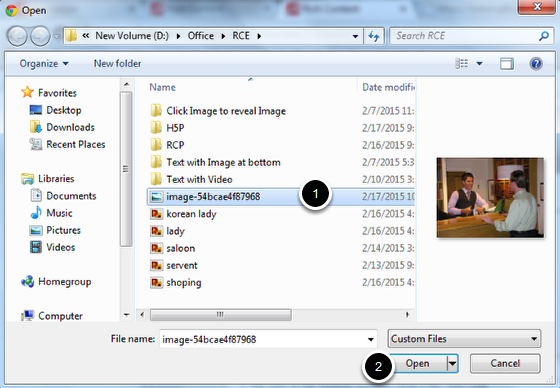
On the above screen, select the required image [1] and click the Open [2] button.
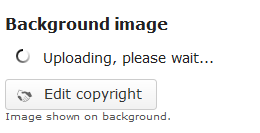
You can see image being uploaded as shown in the above image.
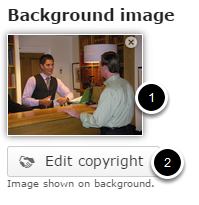
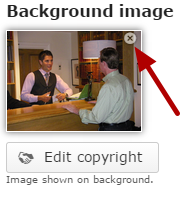
Once the image has been uploaded, it will be shown under the Background Image title as shown [1] in the above image. Optionally, you can update the copyright details of the uploaded image by clicking the Edit copyright [2] button shown above. Once you click the button, you will see the below screen.
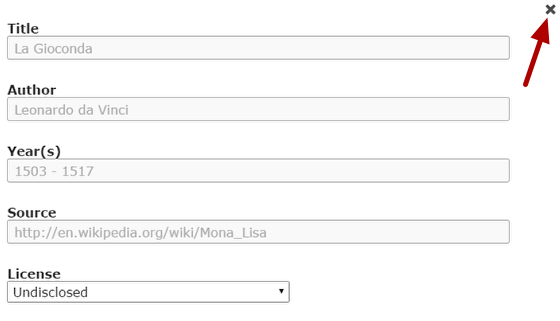
You can enter the image's copyright details on the above screen and click the Close button to update it. You can remove the uploaded image by clicking on the Remove file button shown on the below image.
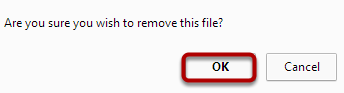
You will be prompted to remove the image as shown in the below image. Click OK to confirm and remove the image.
You can also update the image without removing it by clicking on the uploaded image.
Step 4: Enter Color in Hexadecimal Format

Type the color of the specified hotspots in hexadecimal color code as shown in the above image. By default it is set to 000000, which is black.
Step 5: Enter Header Text

The Header is the title of the hotspot. Type the header text on the Header field as shown in the above image. This field is mandatory and must have some text in it.
Step 6: Add Text Description
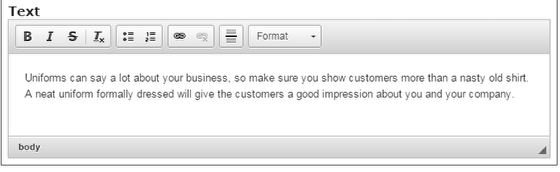
The Text is the full description. You can add as much text as you like. Scrollbars will appear if the amount of text cannot be viewed within the image. Type the description text on the Text field as shown in the above image. You can also change the format of the text, add and remove hyperlinks and insert horizontal lines between the contents. This field is mandatory and must have some text in it.
Step 7: Add Horizontal and Vertical Location Values
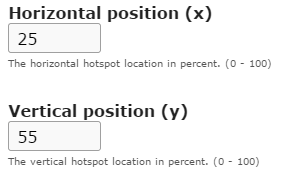
The Horizontal position and Vertical position are specified in percent, from the left and from the top of the image respectively. Type the horizontal and vertical location values in the Horizontal position (x) and Vertical position (y) field as shown in the above image. These fields are mandatory and must have value between 0 and 100 in it.
Step 8: Add more Hotspots
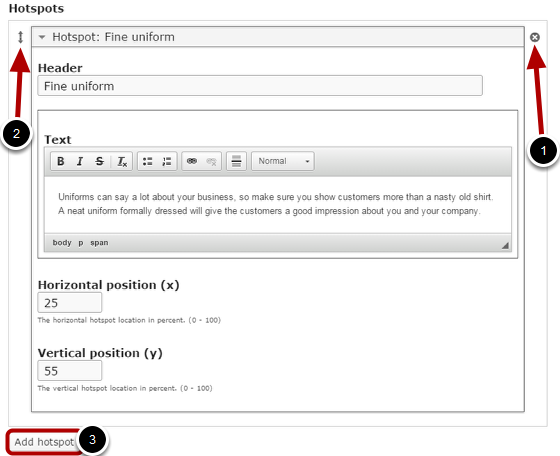
By default, there is only one hotspot available at the beginning. If you want to add another one, click the Add hotspot [3] button as shown in the below image. Another hotspot will be added after you click the Add hotspot button. You can remove any hotspot by clicking the X [1] button on the top right corner of the Hotspot window. You can also change the order of the hotspots by dragging the Double Headed Arrow [2] button on the top left corner of the hotspots window. Similarly, you can add as many hotspots as you want.
Step 9: Click the Done Button

Once you've updated all the details, click the Done [1] button shown above to complete editing the page. You can cancel creating the page just by clicking the Remove [2] button shown above. If you click the Done button, you will see the below screen with a preview of the created page.
Step 10: Click the Create Button
If you still want to edit the page, just double click on the preview page, and you will be taken to the Edit page. If you've done all the changes, you can click the Create button as shown above picture to finish editing the page.
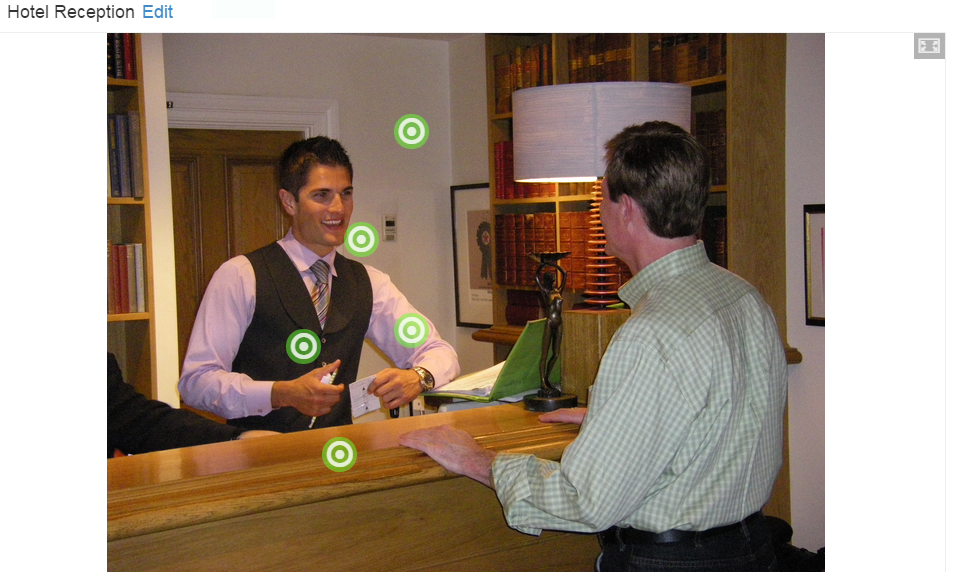
You can see the finished page as shown in the above image.
Notes
- You can create as many pages as possible in a Presentation using this component.
- You can add any number of hotspots in a page using this component.
- The color of the hotspot must be the hexa decimal value.
- To know the hexa decimal code of the color for the hotspot, you can visit http://html-color-codes.info/
- If you want to position the hotspots precisely, you can follow the trial and error method. Apply some values between 0 to 100 in Horizontal position (x) and Vertical position (y) fields, have a preview and change it accordingly again if it is not precise. You can always press Save to view the result before going back to the editor in order to change the position values.
- The image will be scaled (proportionally) to fit the max width of the container in which it is placed. Therefore, choose an image with a suitable resolution.
- You can upload images in .jpg, .png and .gif. formats only